Showing posts with label made with love. Show all posts

11.12.2012

Made with Love {ugly painting turned word art}

This project has been all around Pinterest for a while, so when I saw this "interesting" artwork at a garage sale, I snatched it up to give it a try. 
It was $2.


I bought some vinyl letters at Lowe's.
They totaled $6.

I laid them out how I wanted them.


Stuck them on.


Spray painted the entire thing with paint I already had.
Waited as long as I could for it to dry...I hate this part.  I never wait as long as I should.


And carefully peeled off the vinyl.

Since my artwork wasn't actually a painting but a print, the vinyl tore some of the "painting" off, but I actually love how it looks.


If you look closely, you can see a nice layer of dust on the black credenza...
I take every opportunity I get to use the word credenza.

So go find the ugliest painting you can find and make something beautiful out of it.

Photobucket

8.20.2012

Made with Love {easy shredded beef}

I love food that has sentimental meaning to it.  
Pineapple & mandarin cake reminds me of my Gramma Myers.
Hamburger gravy and Susie's surprise reminds me of my mom.
And shredded beef reminds me of my Gramma Amstutz.

Maybe some day I will share all of these recipes with you, but today you're getting the recipe for the one you could do with your eyes closed...except for the sharp knife part.


{Ingredients}
2 1/2 pounds chuck roast
1 can of french onion soup
1 can of cream of mushroom soup {If cream of blank soups creep you out, you can make your own.}

{How to}
Remove fat from roast.
Cut the roast...not the cheese...into chunks.  Place in baking dish.
Mix soups together and pour over meat.
Cover and bake at 350 degrees for 3 to 4 hours.
Shred with a fork.

Serves 4-6

You can eat it as is, {Max's preference}, as a sandwich, over mashed potatoes, or over toast.  We usually go the sandwich route.  My condiment of choice is mustard, but mild peppers and/or some cheese would be delicious too.

Hope you enjoy!
Sorry for the junior high humor...

What food do you have a sentimental attachment to?

Linking up with Tatertots & Jello
Photobucket

6.05.2012

Made with Love {Berry Buttermilk Cake}

Sometimes when I don't want to clean, I bake.  So I decided to try this recipe from my favorite food blogger.

I had a slight complication...

When you are roasting strawberries in the oven, don't take a shower.

They will burn.

So, my roasted strawberry buttermilk cake turned into this.


I didn't have enough strawberries, so I decided to add some blueberries.  Any berry - or peaches - or pears would work just fine, I'm sure.


Nothing says nap time like a warm piece of cake and a cold glass of milk.


Berry Buttermilk Cake
adapted from Joy the Baker because I took a shower

Ingredients
8 oz of fresh berries
2 1/2 cups flour {I used half all-purpose and half whole wheat flour}
1/2 cup sugar
1 Tbsp. baking powder
1/2 tsp. salt
2 Tbsp flaxseed meal
2 eggs
1 1/2 cups buttermilk {I always make my own - add milk to 1 1/2 Tbsp lemon juice to make your 1 1/2 cups.  Let stand for 5 minutes}
1/4 cup butter, melted
1 tsp vanilla
sugar for sprinkling {I used 2 Tbsp}

optional:
whipped cream
I think a strawberry sauce would be delicious too.

Directions
Spray your pan.  I used an 11-in. tart pan.

If you're making your own buttermilk, make that first.

Hull and cut strawberries in half.  Set aside with any other fruit you may be using.

Melt the butter.  Set aside.

Mix together flour, sugar, baking powder, salt and flaxseed.  Set aside.

In another bowl, whisk together buttermilk, butter and eggs.  Pour over flour mixture.  Add half of your berries.  Mix until combined.

Pour into pan.  Arrange the rest of the berries on top.  Sprinkle with sugar.

Bake for 20-25 minutes at 400 degrees.

Enjoy!

Linking up with Tatertots & Jello
Photobucket

5.01.2012

Made with Love {May Day Baskets}

Happy May Day!  

I decided to make some baskets for our neighbors this year.  They were super easy to make {took less than an hour} and it was inexpensive {less than $6 for 9 neighbors}.


This is what I used to make the baskets. You can get the Jiffy pots in most garden sections of your local grocery store.  The fabric is a sheet that I got at Salvation Army.


How to:
Make a hole on either side of the pot using your hole punch.  You want to make the hole big enough that you can get the fabric through, but not too big that the fabric won't hold.  I did 2 hole punches side by side.  You also want to make sure that your hole isn't too close to the edge of the pot.

Plant your flowers.  Make sure to not fill it past the holes on the sides.  Now would be a good time to water them lightly. 

Cut out your gift tags and punch a hole at the top and string the fabric through.

Attach the fabric by tying knots on the inside of the pot.

Deliver!

Max was such a good helper.


He made sure the flowers smelled good enough to give to the neighbors.


And he was very gentle as he was holding them.


Nothing says, "Happy May Day!" like a monster truck shirt.

Linking up with Tatertots & Jello

--------------------------------------------------------------------------------------------

Don't forget about joining my linky party this Friday!  


Here are the questions.


Photobucket

4.20.2012

Meal Plan {toddler approved...depending on his mood}

I'm joining Carina and Sarah for a meal planning party.  I love cooking, but I'm a horrible planner.  I'm excited to check out some other participants' meal plans.

This is what I came up with...

Breakfast
cereal bars & yogurt.  This is the yogurt I make at home.
smoothies like this one.
cereal
toast & fruit
oatmeal & fruit

Today we had donuts and fruit.  The fruit totally balances out the cups of sugar in the donut.

Lunch {toddler version}
Most days, we have leftovers from the night before.
mac & cheese w/ broccoli
veggies, crackers and hummus
cheese quesadilla
Chick-fil-a is always a good option. :)

Dinner
kale & walnut pesto pasta - recipe below
sour cream chicken enchiladas - I used my homemade yogurt instead of sour cream.
pesto & chicken pasta soup - recipe below and 1 hour rolls
root beer bbq pulled pork
ham & spinach no-crust quiche


Kale and Walnut Pesto Pasta
adapted from real simple magazine

There is probably nothing more unappealing than green pasta, but I promise, it's good.


1/3 c.chopped walnuts
1 bunch kale (about 12 cups)
1 cup parmesan cheese
1 garlic clove
1.2 tsp. salt
1/4 tsp. pepper
1/2 c. olive oil
3/4 lb. pasta

Toast walnuts in 350 oven for about 5 minutes.

Bring salt water to a boil.  Add kale and remove after 30 seconds.  Place kale in colander to drain.  Reserve cooking water for pasta.  Squeeze dry kale when cool enough to handle.

Combine kale, parmesan, garlic, walnuts, salt and pepper in a food processor.  Slowly add olive oil while processor is still running.

Bring reserved water to a boil and cook pasta according to package directions.  Drain.  Save 1/2 cup of cooking water.  Return to pot.  Add pesto and water as needed.

Sprinkle with walnuts and parmesan if desired.

Pesto & Chicken Pesto Pasta
adapted from tasty kitchen


1 Tbsp butter
1 medium onion
1 carrot chopped
2 cups shredded chicken
2 cups pesto pasta
2 c. water
2 1/4 c. chicken stalk
salt and pepper

Melt butter over medium heat.  Saute onion and carrot for 4-5 minutes.
Add water and chicken stalk.  Bring to a boil.
Add chicken and pesto pasta.  Simmer until heated through.  Add salt and pepper to taste.

Tip:  I boil a bunch of chicken breasts at one time.  Then, I put them in my Kitchen-Aid mixer and shred the chicken using the paddle.  It shreds it pretty fine, which is perfect for a toddler.  I divide the chicken into 2 cup baggies to use for other dishes.


null

4.15.2012

Made with Love {gallery wall}

The wall is completely finished and I'm completely happy about it!


Max and I painted the canvases.  I think you should be able to figure out which one Max did.  He was so particular and serious {not a shock} while doing it.

We decided to line up the top of the bottom frames in a straight line and the bottom of the top frames in a straight line.  You might have to read that sentence over a couple of times...

The frame on the lower right was another DIY project.

I painted some clothespins and picked out some of my favorite pictures.


I added some wire by wrapping it around existing hardware on one side and some pushpins on the other.


Such an easy project!


And just so you can see the un-cropped version and us in real life...


May all of your DIY projects be lovely and stress free!

Linking up with Tatertots & Jello.
Photobucket

3.29.2012

Thankful {weekend projects}

Last weekend, Max stayed with Wes' parents - which meant we had some time to get some projects done started around the house.

I painted this for the play room.  It still needs to be hung above the piano.


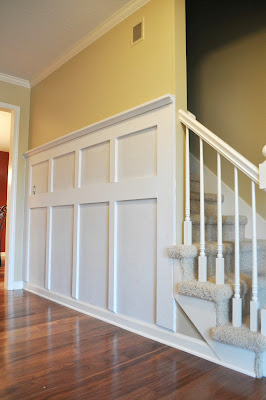
Wes worked on our entryway wall.  I'm so excited about this project.  We got the idea and how-to here.


If you need something done with precision.  This is your guy.


Primed is as far as we're getting until we get back from Florida...


Thankful for grandparents who watch and love on Maxwell.

Thankful for a husband who is handy.

Thankful for a house that we can make our home.


a punk, a pumpkin and a peanut
Photobucket

3.13.2012

Made with Love {by grace.}


Many people think that humanity is good...that we are fine just the way we are...like this frame.


But actually, we're pretty useless on our own.  We have no purpose...and we just take up space collecting dust...like this frame.

"As for you, you were dead in your transgressions and sins..."
Ephesians 2:1

But God...

He is the only one that can make something beautiful out of something that someone who was once dead.
He is the only one that can bring purpose to someone's life that is otherwise meaningless without the knowledge and faith that Jesus Christ died for your {and my} sins.

"For we are God's workmanship..."
Ephesians 2:10a


He is the only one that can cut away the cravings of your sinful nature.


And just when you think that you have arrived...that you have this "being a Christ follower thing" down pat...He finds ways to gently {or not so gently} remind you that there is still some work to be done.

More sinful desires and thoughts.

More cutting.


So you follow Him...even though you can't see the big picture...you start to see Him working in your life.


He begins to put things into place.  Maybe not in your time or the way you would have done it.


But when you look back, and see where He has brought you from, you are grateful.  You see what a beautiful thing he is making out of your life.


The most amazing part?  

It is all by His grace.  There is nothing you can do to earn your salvation.  You can't go to church enough.  You can't help the poor enough.  You can't be nice to your not-so-nice co-worker enough.  

It's a gift.


"For it is by grace you have been saved, through faith - and this not from yourselves, it is the gift of God - not by works, so that no one can boast."
Ephesians 2:8-9


My prayer for you today.
That you would..."grasp how wide and long and high and deep is the love of Christ."
Ephesians 3:18


Linking up with Tatertots & Jello

Photobucket

LinkWithin

Related Posts Plugin for WordPress, Blogger...